| |
|
|
|
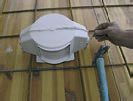
secure the box nailing it to the housing reinforcement, to the point where the spotlight will be installed |
| |
|
|
|
|
| |
|
|
|
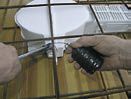
ensure the box to the reinforcing bars, even tying it; pass the cables through the little holes especially made at each side of the boxes.
If it is well done the using of fixing nails can be avoid.
|
| |
|
|
|
|
| |
|
|
|
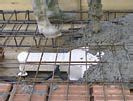
open the entrance hole of the alimentation corrugated tube (do not forget) and insert it in order to remain still |
| |
|
|
|
|
| |
|
|
|
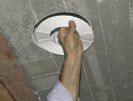
pour the concrete and after that, disarming, we would find
the 150mm hole, on the new realised ceiling. |
| |
|
|
|
|
| |
|
|
|
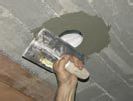
later, or when necessary, it could be possible to apply the compensation grids deciding the size of the holes and the sizes of the spotlights to be installed, cutting the grid to the necessary sizes |
| |
|
|
|
|
| |
|
|
|
A subsequent shaving with glue tiles or glue for normal plasterboard will allow hiding the remaining grill, leaving space for the perfect hole required.
Caution: Do not use lime plaster and cement directly on the grill,
make always and firstly the shaving as a support
|
| |
|
|
|
|
| |
|
|
|
|